1. Create an algorithm
The main idea of Imaging Server Kit is to convert a Python function into an algorithm. Algorithms can then be turned into web servers, Napari widgets, and more.
This first step of the tutorial covers the basics:
- Write your image processing logic as a standard Python function.
- Decorate it with
@sk.algorithm. - Annotate parameters so that they are validated and displayed correctly.
- Annotate return values so that outputs are displayed and handled correctly.
Note
The examples in this tutorial rely on Napari; install the Napari extra with: pip install "imaging-server-kit[napari]" if you want to run them.
Writing a Python function
Your image processing logic should be wrapped in a Python function. For example, here is a Gaussian filter:
from skimage.filters import gaussian

def gaussian_algo(image, sigma=1.0):
    filtered = gaussian(image, sigma=sigma, preserve_range=True)
    return filtered
This function takes an input image (a NumPy array), applies a Gaussian filter to it, and returns the filtered image. The sigma parameter controls the strength of the blur.
Turning the function into an algorithm
To convert this function into an algorithm, import imaging_server_kit and decorate the function with @sk.algorithm:
from skimage.filters import gaussian
import imaging_server_kit as sk

@sk.algorithm
def gaussian_algo(image, sigma=1.0):
    filtered = gaussian(image, sigma=sigma, preserve_range=True)
    return filtered
gaussian_algo is now an algorithm object:
You can try it out in Napari with sk.to_napari, and add an example image to the viewer for testing:
A Napari viewer opens with your algorithm available as a dock widget. You can apply the filter to the image and adjust sigma to control the blur.
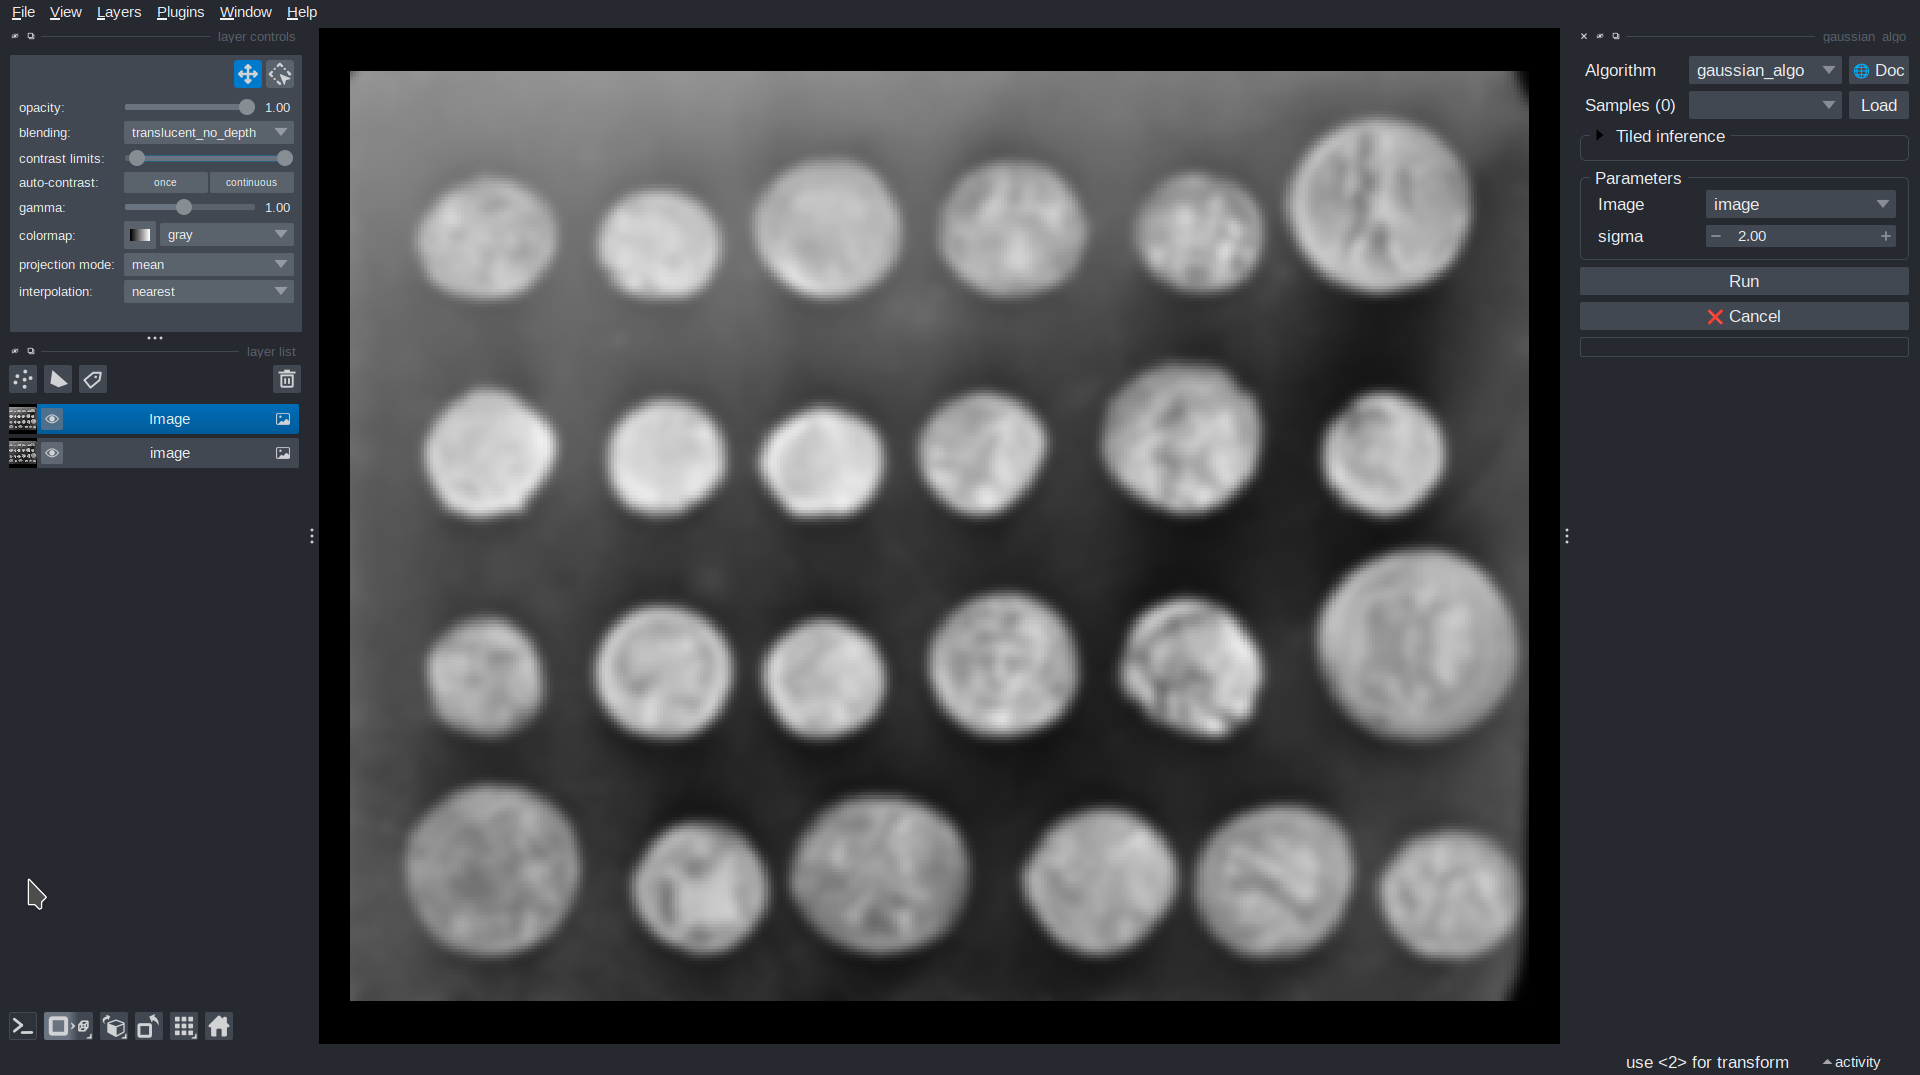
The algorithm works, but there is room for improvement. For example, nothing prevents users from entering a negative sigma, which raises an error. To fix this, we need to annotate parameters.
Annotating parameters
Annotating parameters tells Imaging Server Kit how to interpret the function arguments. Each parameter is matched with a data layer, which is used to validate its value and to display it in user interfaces.
Here is an improved version of the Gaussian filter, where sigma is annotated through parameters={} in the decorator, with a minimum and a default value:
@sk.algorithm(parameters={"sigma": sk.Float(min=0, default=1.0)})
def gaussian_algo(image, sigma):
    filtered = gaussian(image, sigma=sigma, preserve_range=True)
    return filtered
In Napari, sigma can no longer be set to a negative value.
Data layers
Data layers are a key concept of Imaging Server Kit. They are used to store data, describe the meaning of input parameters and algorithm outputs, and more.
In the example above, sk.Float is the data layer for floating-point values. It supports options such as:
min,max, anddefaultstep(for UI sliders and spin boxes)name(the label shown next to the parameter)
See Data layers for the full list of layers.
parameters={} is the most explicit annotation method, but type hints, default values, and even variable names also work. All the following are valid:
# Explicit annotation
@sk.algorithm(parameters={"img": sk.Image(), "sigma": sk.Float()})
def gaussian_algo(img, sigma):
    ...

# `image` variable name, default value for sigma
@sk.algorithm
def gaussian_algo(image, sigma=1.0):
    ...

# Type hints
@sk.algorithm
def gaussian_algo(img: sk.Image, sigma: float):
    ...
When several methods apply to the same parameter, explicit annotations take priority. See Matching parameters with data layers for a full review of the rules.
Annotating return values
Return values should be annotated too. Thanks to this, each return value is assigned to a data layer, and is interpreted and displayed correctly in Napari or QuPath.
Consider a simple threshold algorithm:
@sk.algorithm(
    name="Intensity threshold",  # <- You can also give the algorithm a name
    parameters={
        "threshold": sk.Integer(name="Threshold", min=0, max=255, default=128, auto_call=True)
    },
)
def threshold_algo(image, threshold):
    mask = image > threshold
    return sk.Mask(mask)  # <- Return the binary mask as a `sk.Mask`
The threshold parameter is restricted to values between 0 and 255. With auto_call=True, the algorithm re-runs automatically whenever the threshold changes in the user interface.
The returned binary array should be interpreted as a segmentation mask, so it is wrapped in a sk.Mask data layer. In Napari, it is displayed as a Labels layer. In QuPath, it is automatically converted to a polygon annotation.
Complete example
A segmentation algorithm combining a Gaussian filter and an intensity threshold could look like this:
import imaging_server_kit as sk
from skimage.filters import gaussian

@sk.algorithm(
    name="Segmentation pipeline",
    description="A simple pipeline for segmenting images.",
    parameters={
        "image": sk.Image(),
        "sigma": sk.Float(
            name="Sigma",
            description="Intensity of the blur applied before thresholding the image.",
            min=0,
            default=1.0,
            step=0.5,
            auto_call=True,
        ),
        "threshold": sk.Float(
            name="Threshold (rel.)",
            description="Intensity threshold, relative to the image min() and max() values.",
            default=0.5, min=0, max=1, step=0.1,
            auto_call=True,
        ),
        "dark_background": sk.Bool(name="Dark background", default=True, auto_call=True),
    },
)
def threshold_algo(image, sigma, threshold, dark_background):
    # Apply a Gaussian filter
    blurred_image = gaussian(image, sigma=sigma, preserve_range=True)

    # Compute the absolute threshold to apply
    thresh_abs = threshold * (blurred_image.max() - blurred_image.min())

    # Binarize the image
    if dark_background:
        mask = blurred_image > thresh_abs
    else:
        mask = blurred_image <= thresh_abs

    # Compute the area fraction of the mask
    fract = mask.sum() / mask.size

    # Return all annotated outputs
    return (
        sk.Image(blurred_image, name="Blurred", colormap="viridis"),
        sk.Mask(mask, name="Binary mask"),
        f"Area fraction: {fract:.02f}",
    )

sk.to_napari(threshold_algo)
This algorithm:
- Produces several outputs of different types:
sk.Image,sk.Mask, and a string. For simple types (str,int,float, andbool), wrapping the value in a data layer is optional (the layer type can be inferred). Values of unrecognized types becomesk.Anylayers. - Includes metadata in its outputs. For example,
colormap="viridis"sets the colormap of the blurred image in Napari.
Summary
- Use
@sk.algorithmto convert a Python function into an algorithm. - Annotate parameters with
parameters={}, type hints, default values, or variable names. - Annotate return values with data layers (
sk.Mask,sk.Image,sk.Float, etc.). - Run algorithms interactively in Napari by passing them to
sk.to_napari().
Next steps
Next, we will improve our algorithm by adding samples and metadata.